2. Do something with your data
Perform searches to solve some example use cases and get a feeling for the basic Graylog search functionalities.
Basic searches
Hit Search in the main Graylog navigation, and you should be presented with an analysis of all data that was received in the last 5 minutes. Let's look at the elements of that page:
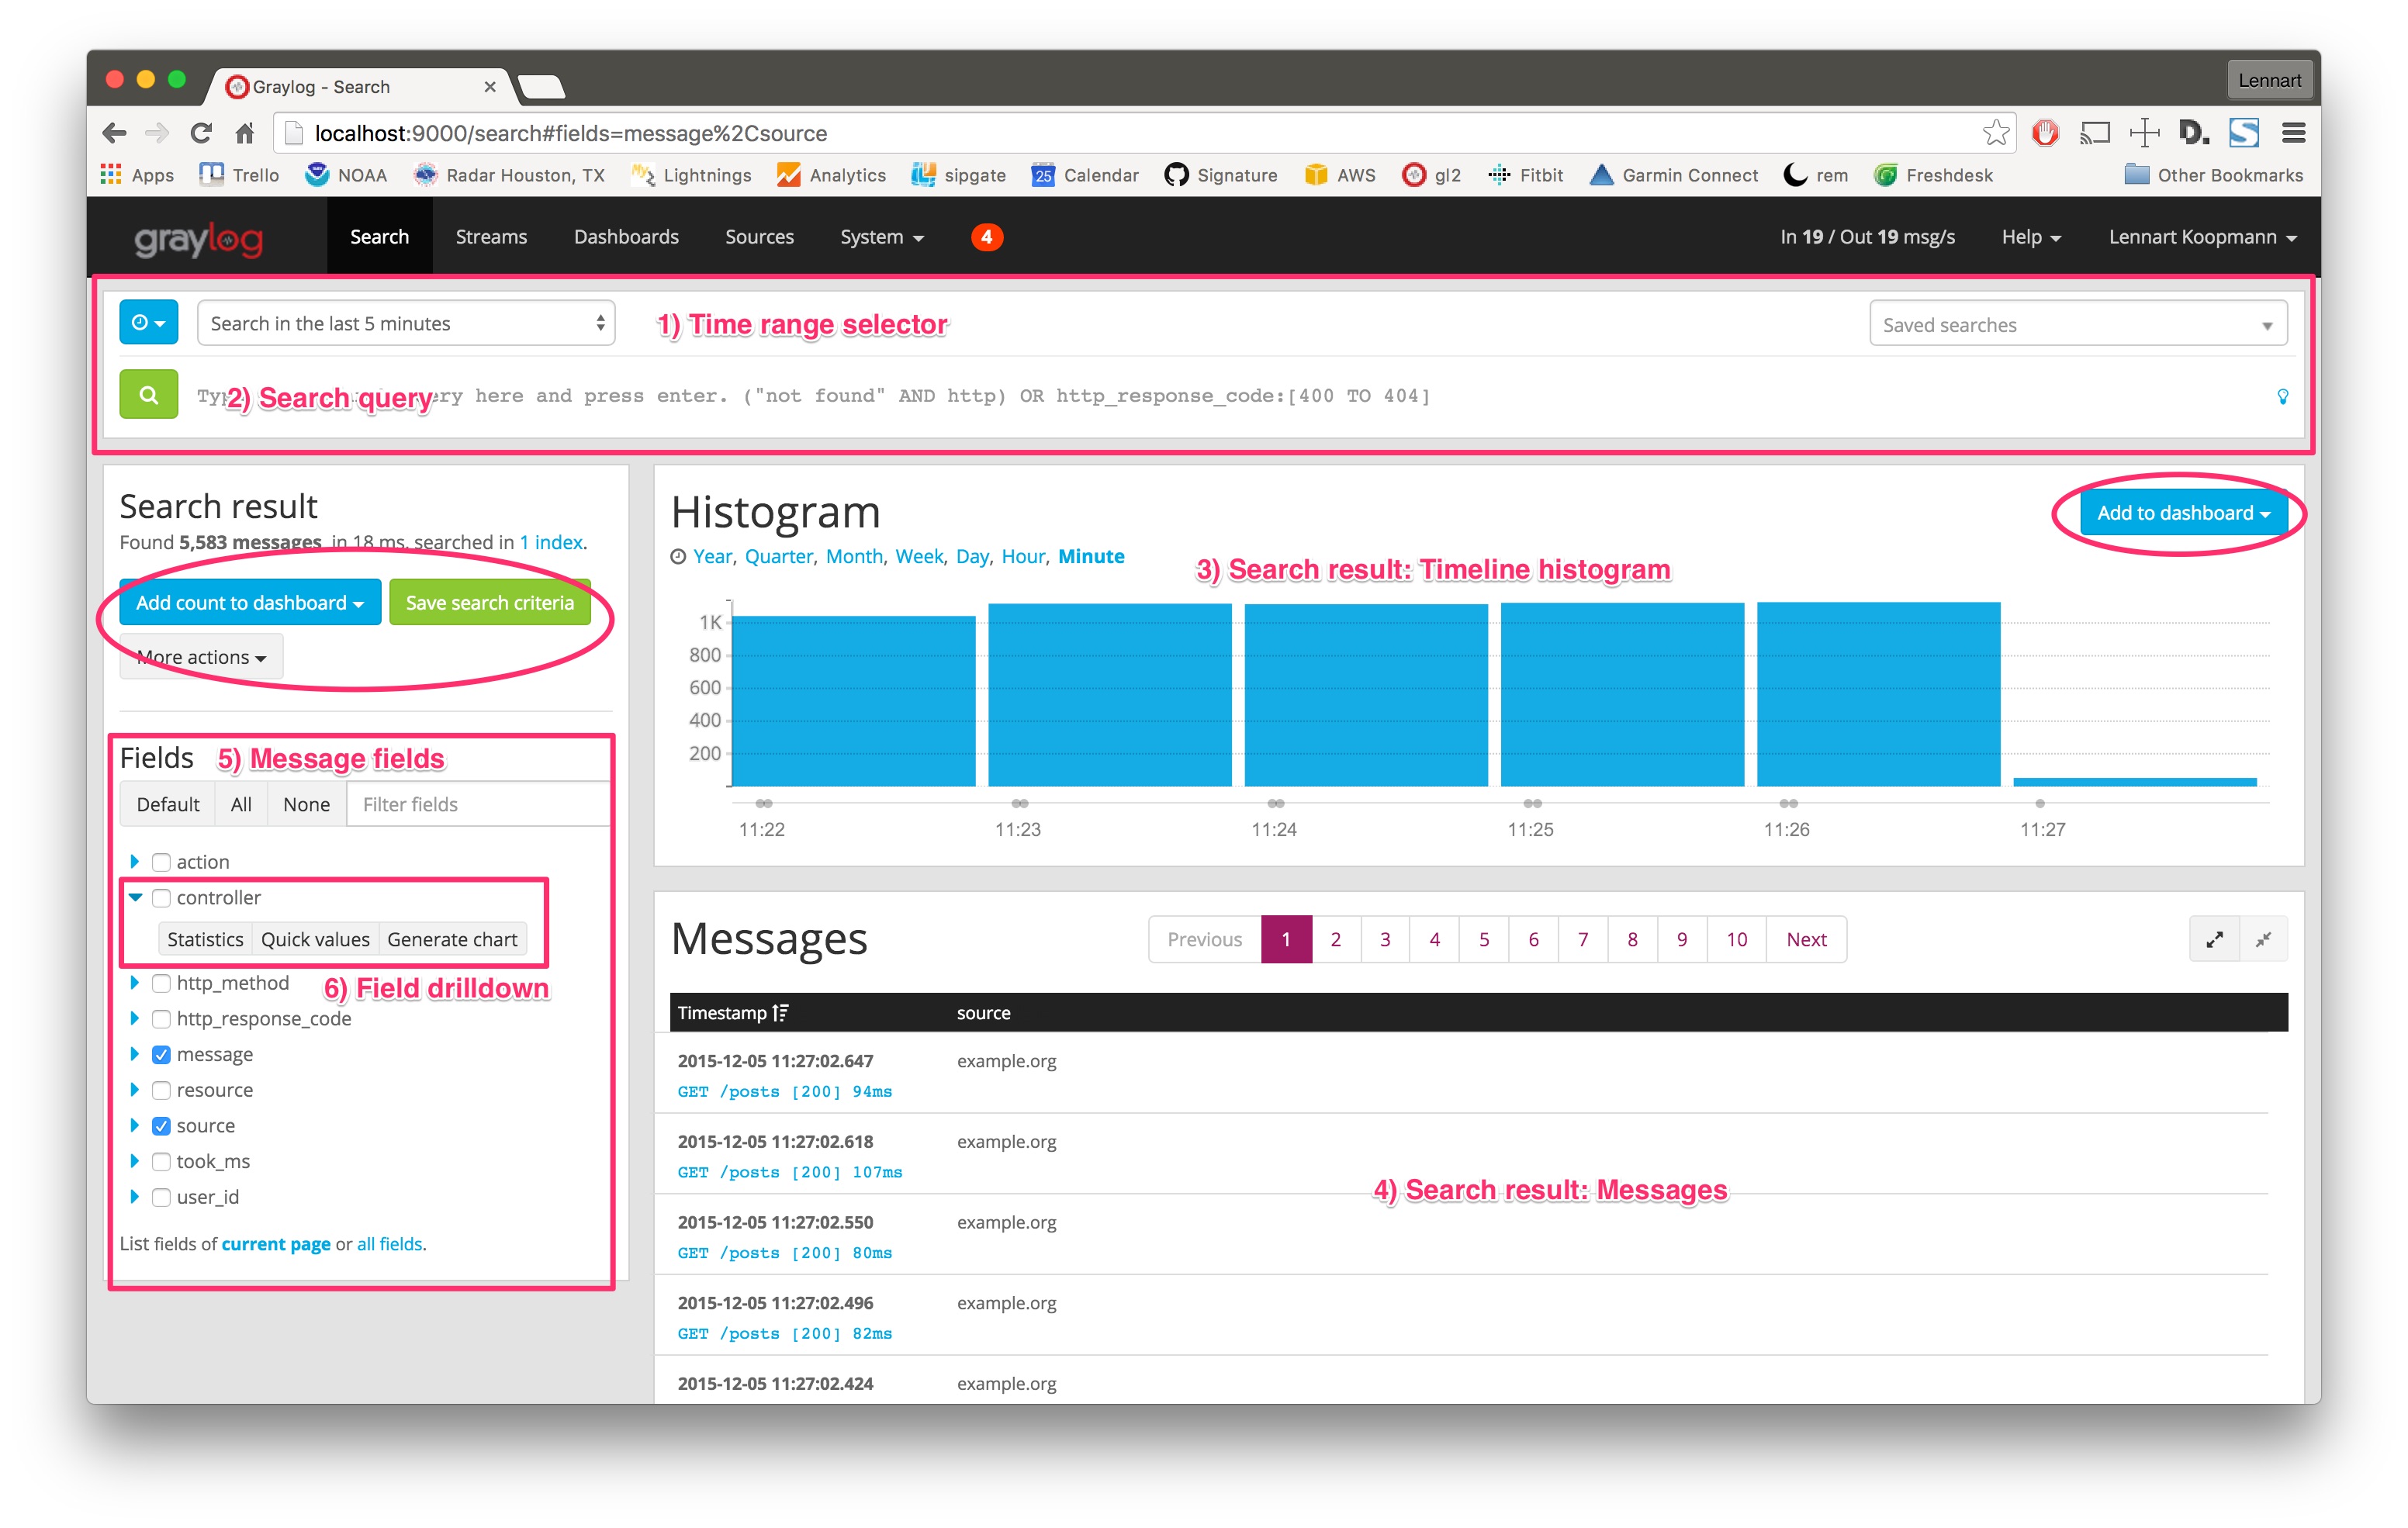
- Time range selector: Select the time range you want to search in. Hit the blue button to select a time range type. Note that for best performance you should always choose the shortest reasonable time range. More detailed information is available in the documentation
-
Search query:
Enter your search query here. You can find a full description of the search query language
in the documentation.
If you want to find all messages in the selected timerange, you can just press enter without
typing anything or alternatively use
*as query. - Timeline histogram: The timeline histogram chart shows you how many messages were found per minute/hour/day/week/month/quarter/year in the selected time range. It is a great way to quickly see when how many messages were received.
- Messages: The messages that your search returned. Click on a message to expand it.
- Message fields: A list of all fields that are part of the messages that your search returned. Click on a checkbox next to a field to include the field and its values in the search results table. Click on the blue arrow to expand field drilldown options.
- Field drilldown: The field drilldown analysis methods allow you to dig deeper into a fields value (computed over the selected time range). Read more about them in the documentation or follow this guide for example use cases.
Example
Let's start with a search over everything that was received in the last 15 minutes, and try to find out which sources sent the most data.
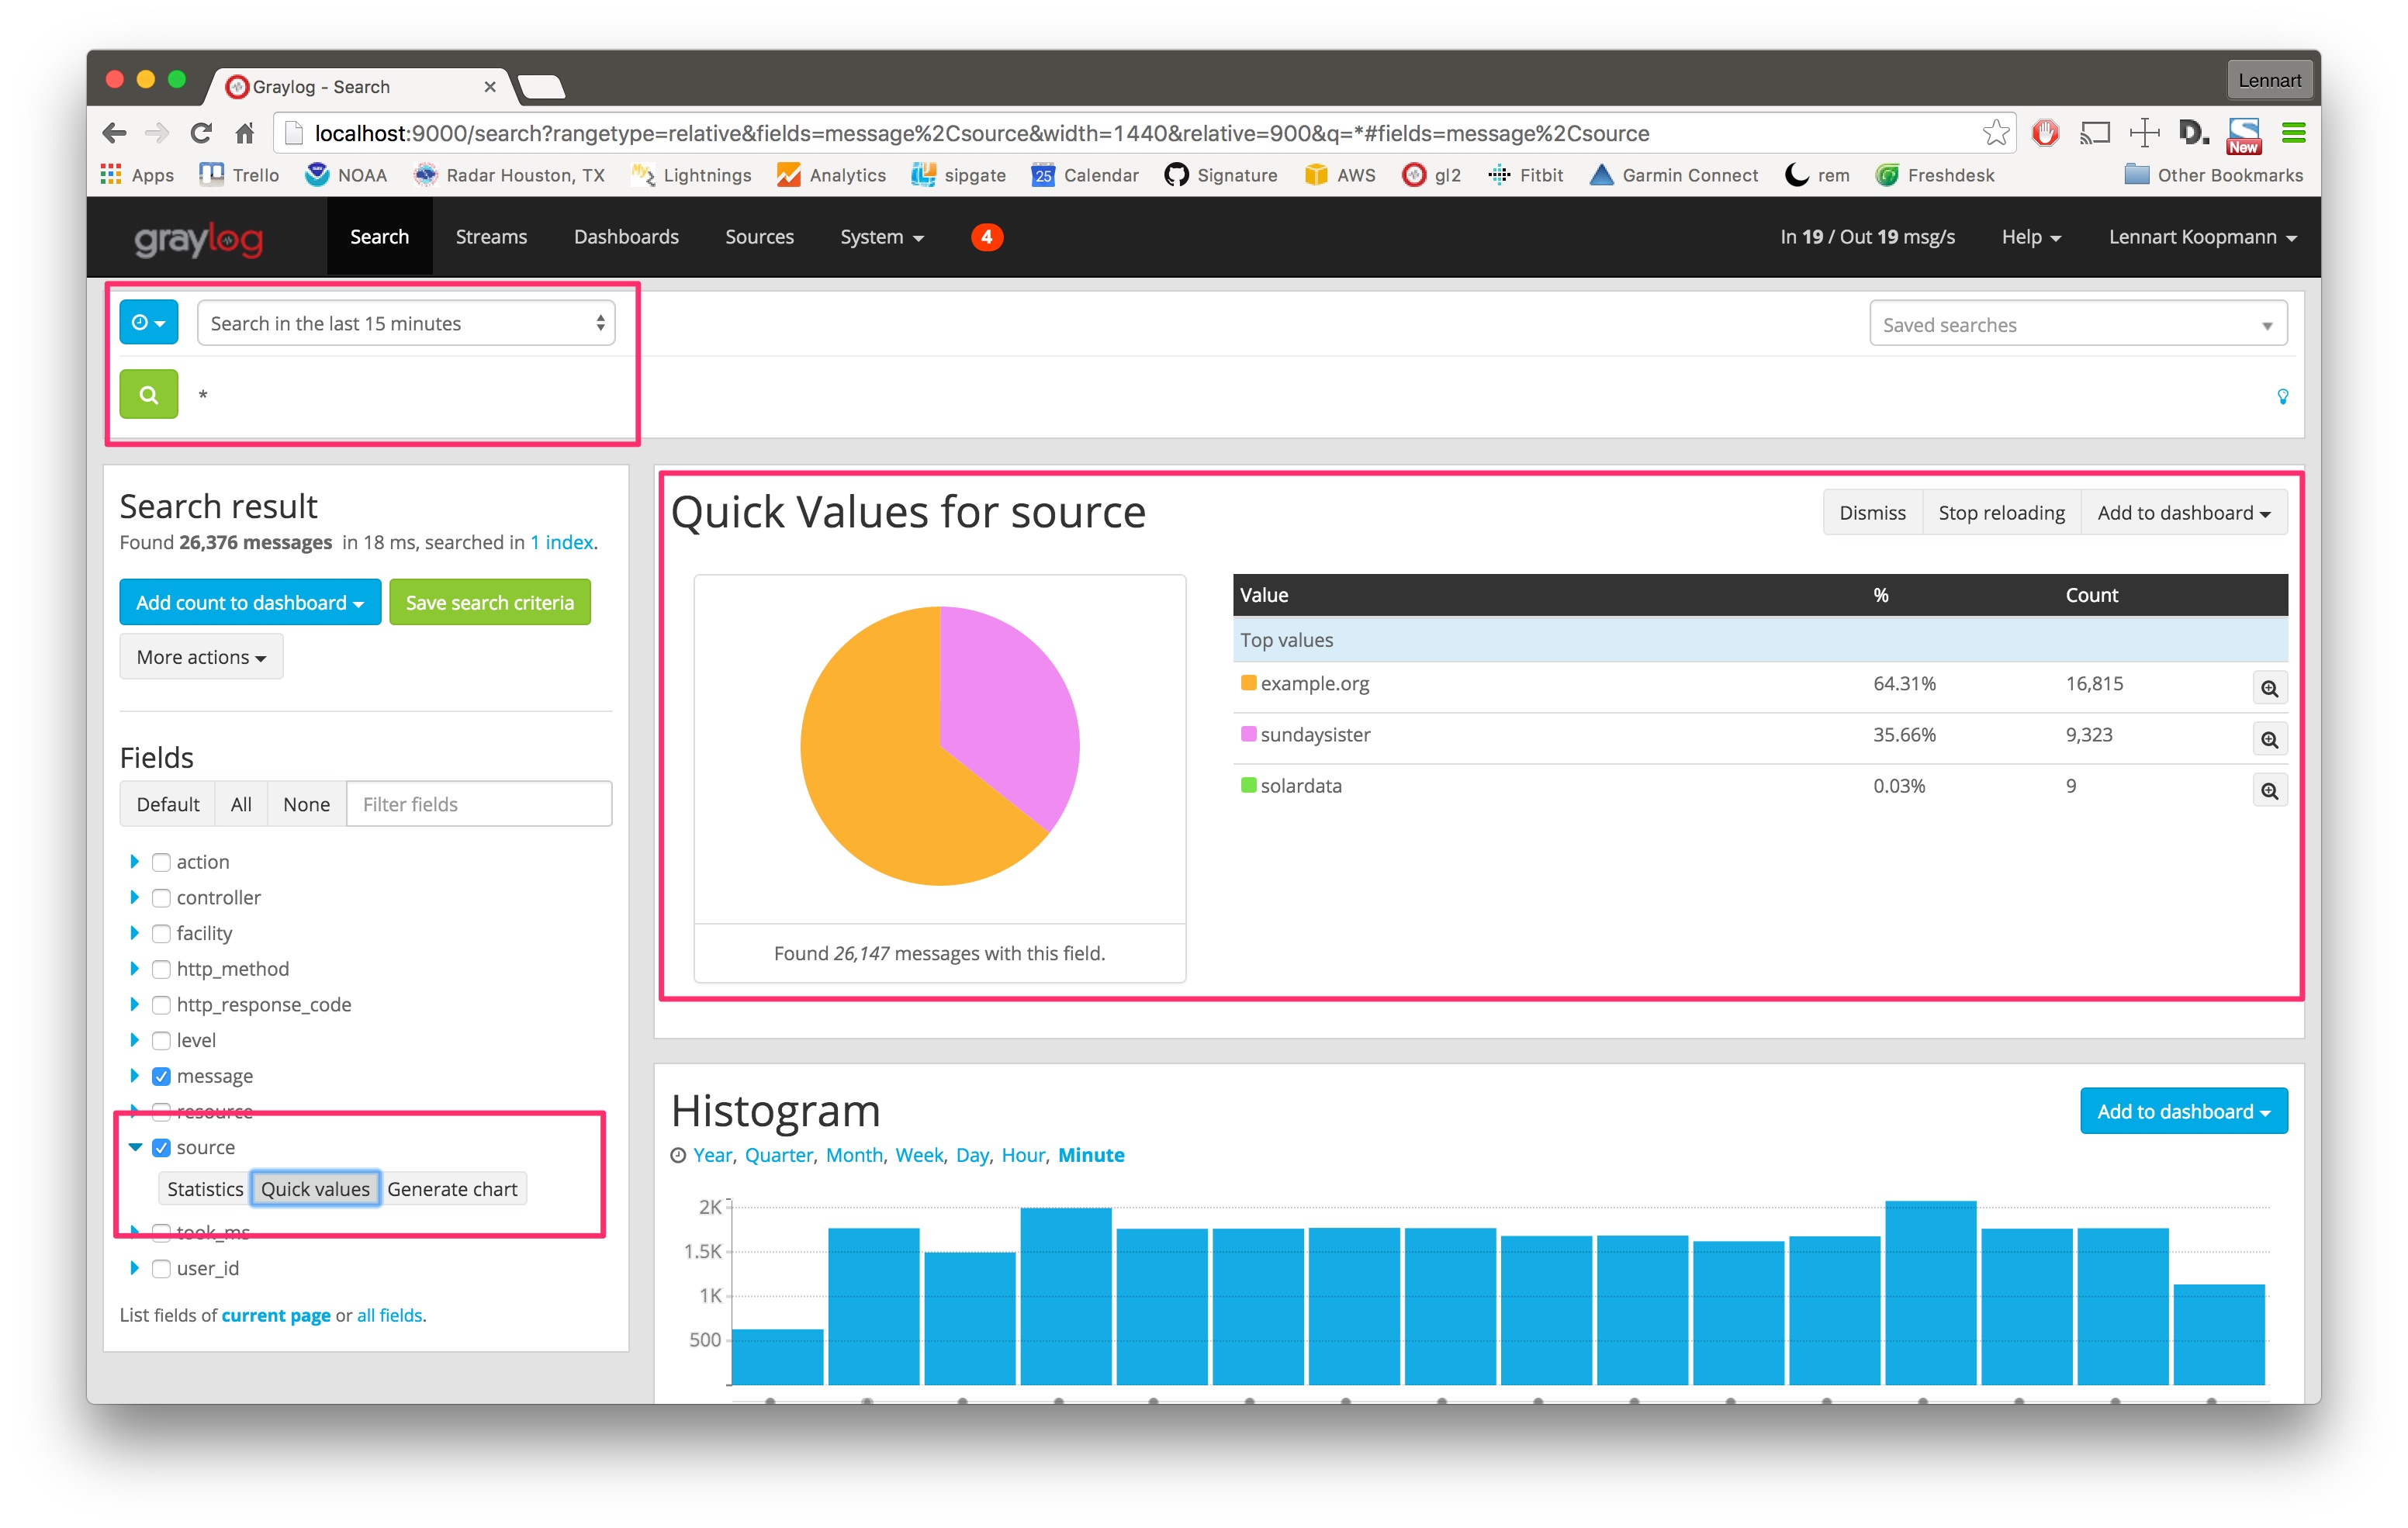
Hit the blue arrow next to the source field and then the Quick values button. This will load the quick value analysis result on top of the search results. You can see that (in the last 15 minutes) the source example.org sent 64.31% of all data and 16,815 messages in total.
The source sundaysister (a hostname of a syslog enabled device) sent 35.66% of the data. Let's dig deeper into that source and find out what kind of data was sent.

Search for all messages from that specific source (source:sundaysister) and run a quick values
analysis on the facility field. You can see that 94.58% of the messages from this source in the
last 15 minutes came from the system daemon subsystems (facility).
Let's look at a second example and try to figure out the response time of a specific part of a web application. (Those structure messages can be achieved using GELF or extractors.)
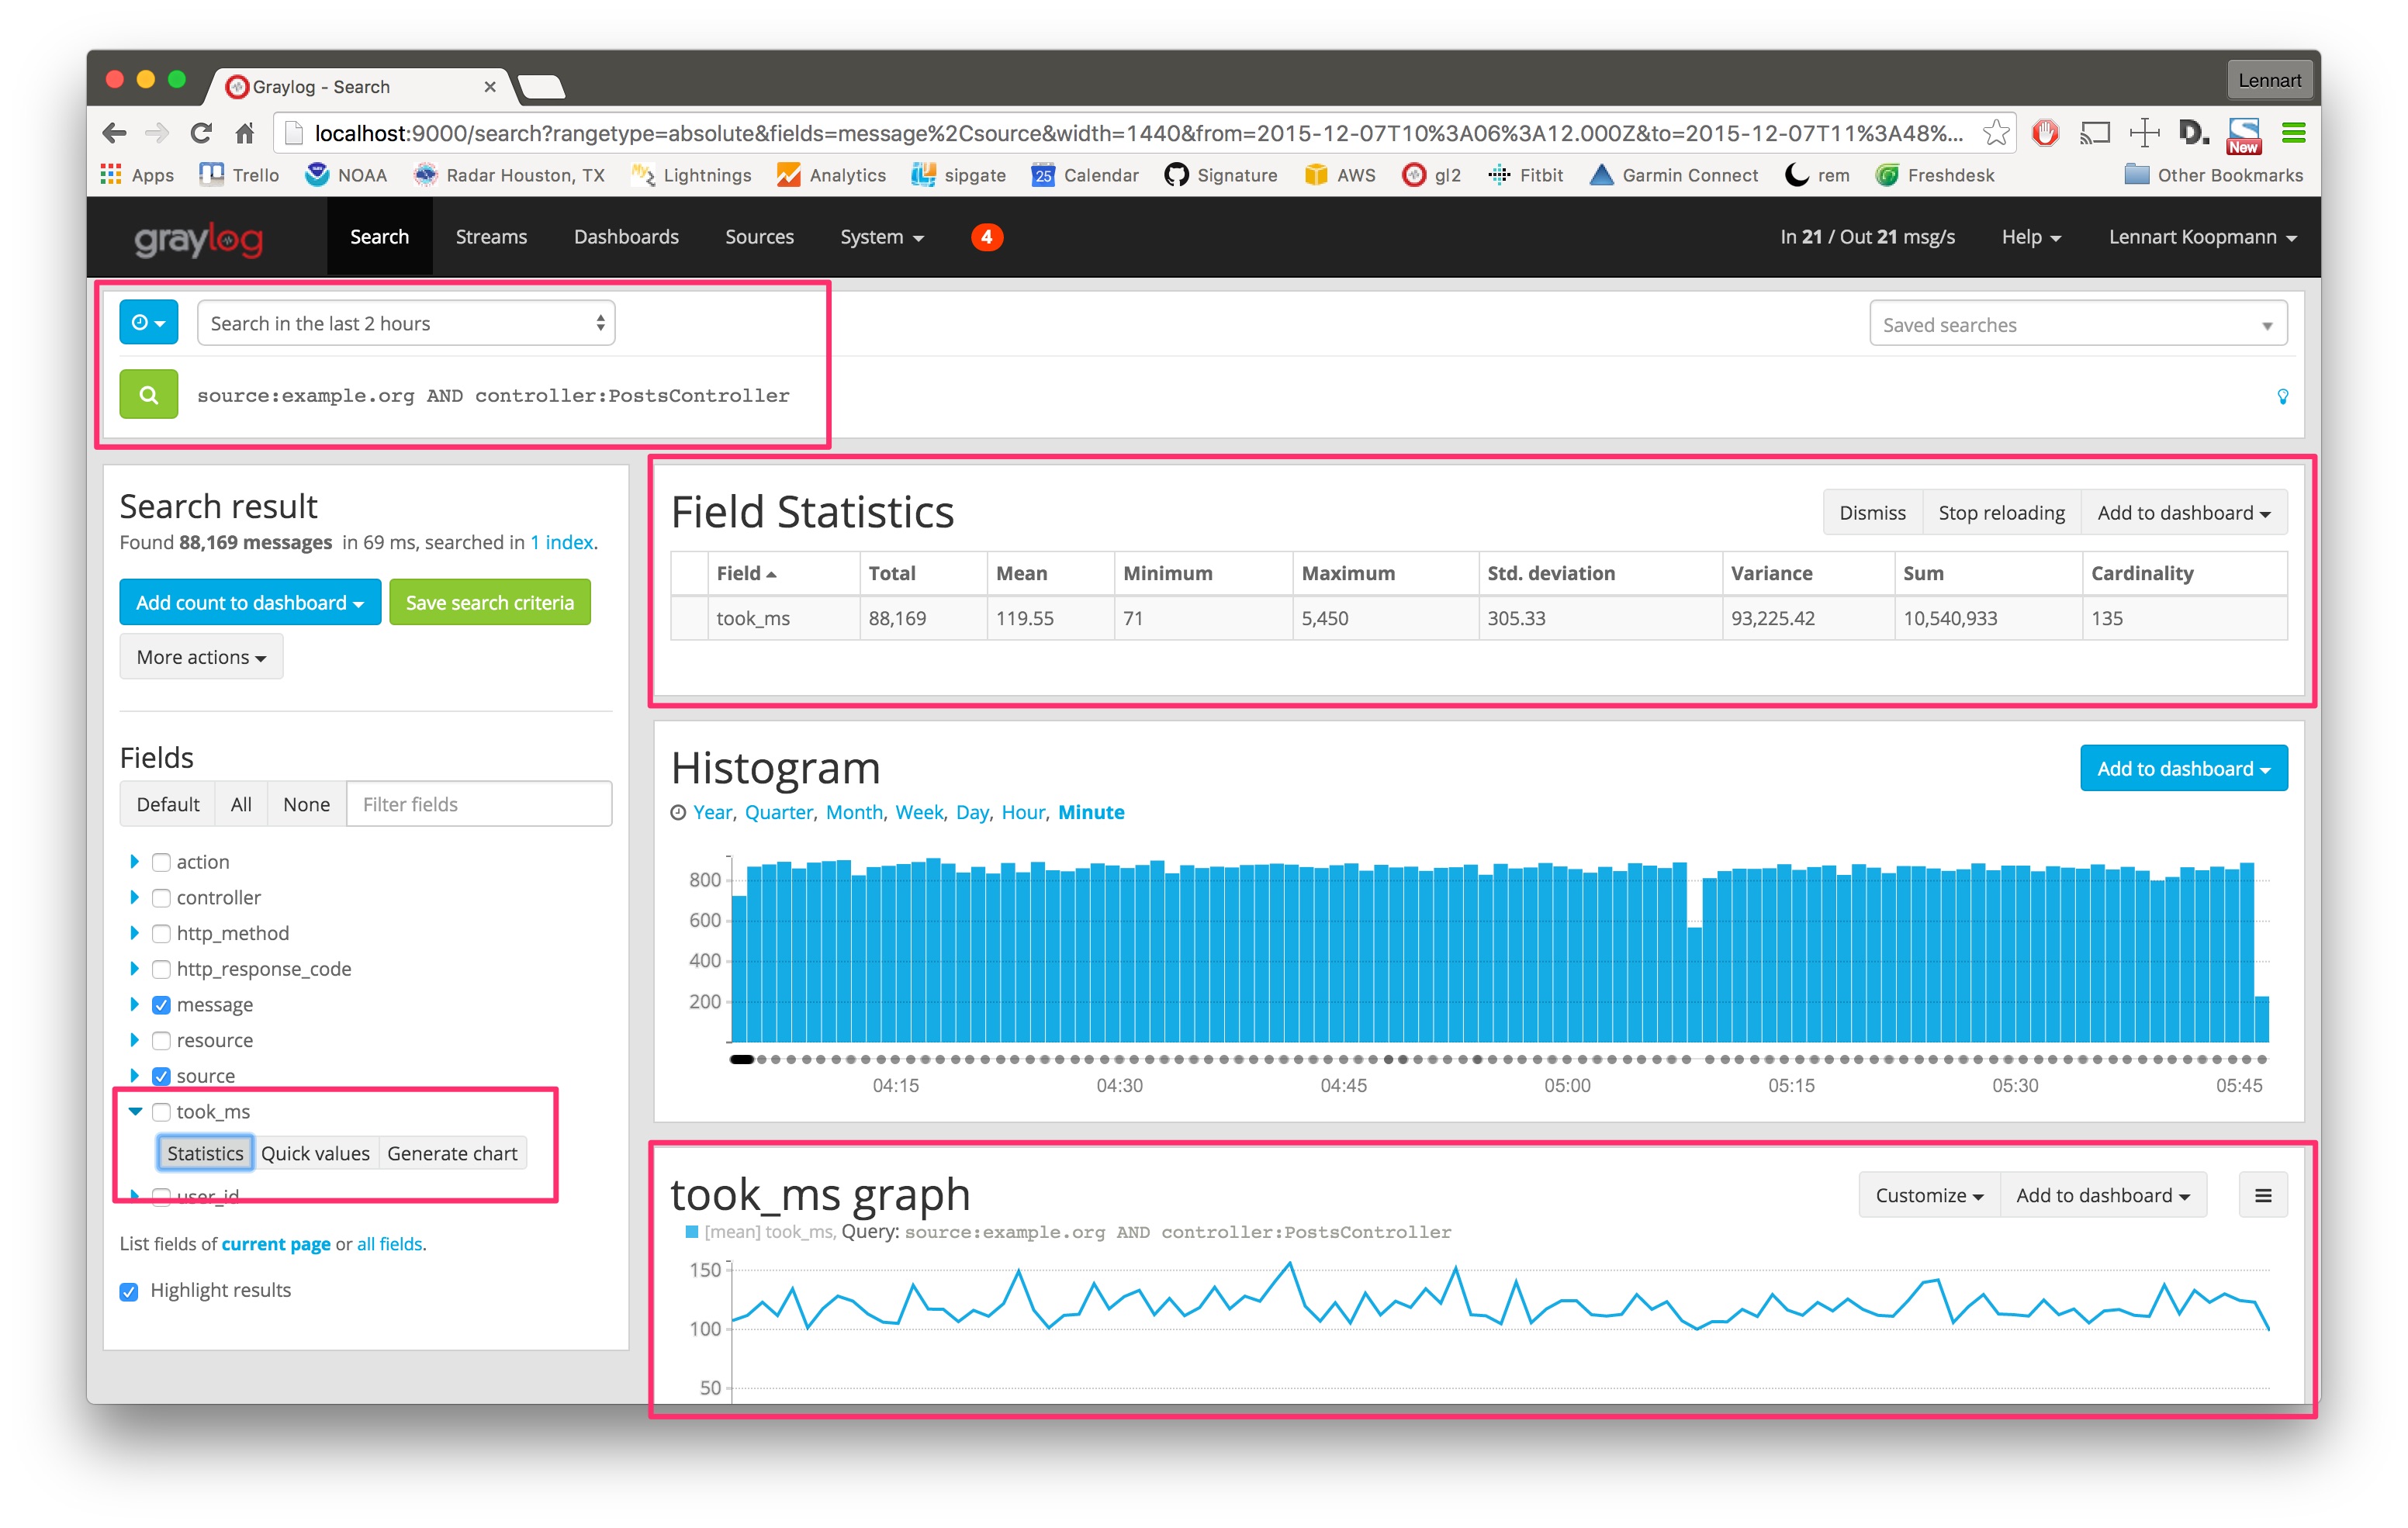
The took_ms field includes a number that represents the milliseconds it took to handle the HTTP request that was logged. The field statistics show you statistical information about the field value (in the last 2 hours in this case - look at the time range selector).
The Generate chart button will create a chart representing the field value over time. You can see that
the response time of this specific part of your application (controller:PostsController) did not
change much in the last 2 hours. You can also see that the field statistics are accurate: Standard deviation is
around 305ms and the mean value is 119ms.